Working with Paths and the Pen Tool
Becoming comfortable with the Pen Tool often takes a while for vector graphic newbies. Unlike pencil-and-paper doodling (or comparatively, using a pencil- or brush-type tool in a typical drawing program), where your hand (or mouse) guides the drawn path, the pen tool creates shapes based on a series of points and their corresponding "direction lines" (Illustrator term) or "handles" (Freehand term).
Drawing a complex shape with a pencil or brush tool usually involves clicking once to start the shape, then holding the mouse button down, and dragging the mouse to follow the lines of the shape. Drawing the same shape with a pen tool involves a series of clicks and drags to set the anchor points and define curve directions. It sounds complicated, but once you get the hang of it, you'll never look back!
Select the Pen Tool, and go for it:
Illustrator:
Freehand:
Click once on the document, then move the cursor and click again. This creates a line that connects the two points.
By clicking again, you can start to create a shape:
To "close" the path to actually make a shape, move the cursor to the original point. When the cursor turns to a pen shape with a small circle, click on the point and the shape will be closed off. If the cursor doesn't change, it means that you aren't quite on top of the original point, so you'll end up just creating another point without closing the shape.
What you've learned so far:
- Clicking with the pen tool creates corner points.
- Each new click creates a connected line segment with the previous point.
- Bringing the cursor back to the original point and clicking will close the path to create a shape.
Now, let's move on to curves.
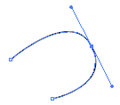
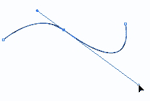
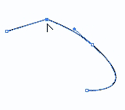
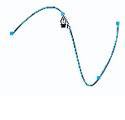
With the same Pen Tool, click once to create a starting "corner" point. Then, click again -- but this time, hold the mouse down and drag. A curve will form. You can continue to hold and drag in different directions to see how the curve is affected. The resulting tangent line can be referred to as a "direction line" or a "handle."
The location at which you place the next point will affect the shape of the resulting curve, as you can see in the examples below:
The black arrow tool selects the entire path (so that you can move it around and resize it). Use the "white arrow tool" (known as the Direct Selection Tool in Illustrator and the Subselect Tool in Freehand) to tweak individual points and direction lines.
Illustrator:
Freehand:
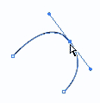
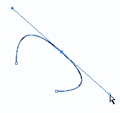
With the white arrow tool, select the point on the curve that you wish to tweak:
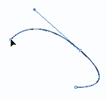
Now, grab one of the direction line handles and pull. You'll see the curves adjust; the entire curve shifts so that the direction line remains tangent to the curve. The side of the curve that you're pulling grows more pronounced the further out you drag the handle.
In another example, you can see how pulling out both handles makes the curve "wider."
The white arrow tool can also be used to move individual points around:
Now you also know how to:
- Use the pen tool to create curved points (by clicking and dragging).
- Use the white arrow tool to tweak points and direction lines.
But there are many more ways that you can work with paths…
A Whirlwind Tour of Other Path Tools
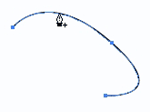
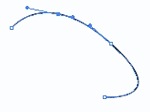
You may add points to an existing path. In both Illustrator and Freehand, first select the path that you want to add points to, then hover over the path with the pen tool. You'll see the cursor change to a pen with a plus (+) sign. Click once and a new point will be added, with direction handles that follow the existing curve. (Illustrator also has the "Add Anchor Point Tool," hidden behind the Pen Tool, which does the same thing but doesn't require you to select a path first.)
In Illustrator, to delete an anchor point, you may also use the Pen Tool to hover over a point until the cursor changes to a pen with a minus (-) sign. Click once and the anchor point will be deleted. Once again, Illustrator does have a separate Delete Anchor Point Tool, hidden behind the Pen Tool.
Also hidden behind the Pen Tool in Illustrator is the Convert Direction Point Tool, which looks like a caret, or just the angle part of an arrow.
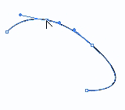
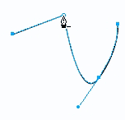
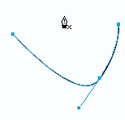
When you use this tool, clicking on a curve point will convert it into a corner point; clicking and dragging on corner points will convert them into curve points. In the diagram below, we converted a curve point into a corner point.
Freehand has combined these functions into the Pen Tool. In Freehand, when you select the Pen Tool and hover over an existing point, you'll see the cursor change to a pen with the same caret symbol used in Illustrator for the Convert Direction Point tool. This functions in the same way as the tool did in Illustrator, and converts a curve point to a corner point (and vice versa).
After you click the point once to convert it, the cursor will change to the pen with a minus sign, giving you the option you to delete the point completely. (Contrast this with the above instructions for Illustrator, where you actually choose different tools for those different functions. Freehand puts all those tools into one.)
Another useful thing you might want to do to a path is to cut it. In Illustrator, the Scissors and Knife tools allow you to cut paths and shapes. In Freehand, the Knife tool combines both functions. Sound complicated? It can be...
The Illustrator Scissors tool and the Freehand Knife tool do the same job: cut a path into pieces. To use either, select the tool, and then click anywhere on a path. You'll notice that it looks like a point has been added to the path. Big deal, right? Well, if you use the white arrow tool and move things around, you'll see that in actuality, you now have two line segments:
Illustrator's Knife Tool allows you to divide a shape into two distinct shapes. Just select the shape with the black arrow tool, then, with the Knife Tool, draw a dividing line -- straight or curved -- and the shape will be divided into two pieces along the corresponding path!
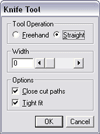
To achieve this same functionality in Freehand, double-click on the Knife tool to get to the options, and check the "Close cut paths" option.
They're the basics of manipulating paths. In the next section, we'll take you step-by-step through an easy, practical example where you can apply all your new knowledge… and even learn a few more tricks along the way!








No comments:
Post a Comment