| Embroidering with Paper
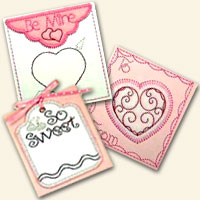
Tips: 1. You will need suitable light weight stipple designs to use for the paper embroidery, such as the Valentine Stipple from My Fair Lady as pictured above. 2. Paper of any weight can be used, and any kind of paper can be used - vellum, mulberry paper, handmade paper, etc. In general, the lighter the paper, the better the stitch quality (strange, I know!). Also, cardstock with texture embroiders beautifully. Bazzill paper is my favorite cardstock to use for paper embroidery. To get a good quality stitch on really heavy cardstock, hoop two pieces of tear-away stabilizer. You can also just float a second piece of stabilizer under the design area. This is a great way to use those pieces of stabilizer that are too small to hoop but too big to throw away. 3. Another way to get a better stitch on heavy cardstock is to stitch the design twice before taking the hoop out of the machine. 4. Use the correct needle. A larger needle will create bigger holes in your paper. Smaller needles tend to break easily, so experiment with your paper to find the best size. I almost always use a size 80/12 unless I am embroidering on really heavy cardstock. 5. Stitch a sample! | |
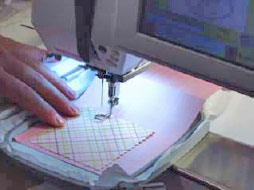
| How to Embroider on Paper | |
|
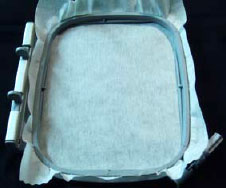
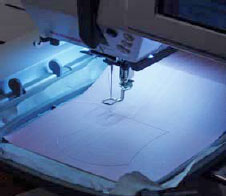
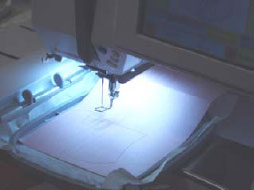
| 1. Hoop a piece of stabilizer. You can use any kind. I prefer tear-away (the cheap stuff). 2. Get your paper ready. After you have chosen your paper and decided what your finished product will be, cut, score, or fold the paper to the finished size. Decide where you want the embroidery design and how it should be oriented. 3. Unfold the paper, and place it on the hooped stabilizer. You will need to lightly adhere the paper to the stabilizer using small amount of adhesive fabric spray or double-sided tape. Do not hoop the paper! If you use adhesive fabric spray like Sulky KK2000 or 505 spray, use it sparingly, as it can soak through the paper. I prefer double-sided tape. Apply the tape to the back of the paper, then stick the paper to the stabilizer. Try to apply the tape so that it is not in the embroidery area, as it can gum the needle. 4. Gently place the hoop in the machine, and sew the design. 5. Remove paper and stabilizer from the hoop. Cut away the stabilizer close to the design. Although it is tempting to tear the stabilizer away (it is tear-away after all!), don’t do it! You can easily tear your stitches or the paper. |
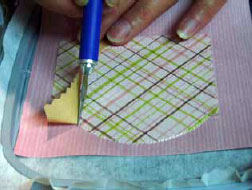
| How to Applique on Paper | |
|
| Paper appliqué is the same as fabric appliqué! 1. Use the same thread for the first three sequences. Sew the first sequence (the outline of the appliqué). This sequence tells you where to put the appliqué material. 2. Place your appliqué material (paper or fabric) over the outline. You may want to adhere this piece with double-sided tape or fabric adhesive. I like to just hold this piece in place until the first few stitches are sewn. 3. Sew the second sequence (same as the first sequence). This sequence tacks the appliqué material down. 4. Remove the hoop, and cut away the fabric or paper close to the sewn guideline. When using paper as the appliqué material, cut the paper away using an X-Acto knife or other sharp blade. Press hard enough to cut the top layer, but not the bottom layer! If you do cut through to the bottom layer, it will be covered by the stitching. 5. Place the hoop back into your machine and sew the third sequence. This sequence finishes the appliqué. Continue sewing the rest of the design.
Click Here for a pintable version of these instructions in .pdf format. These tips are copyrighted and may not be reproduced without prior permission from My Fair Lady |
Monday, September 7, 2009
Embroider on Paper

Subscribe to:
Post Comments (Atom)
No comments:
Post a Comment