| How to use Embroidered Silk Flowers with Embroidery Vest Instructions using Silk Flowers
Materials Used:
Directions: Begin by removing the polysilk artificial flowers and leaves from their stems. Pull apart each flower, removing any plastic parts. Discard stems and plastic parts. Be sure to double check behind the leaves, if there is a plastic part attached, gently peel it off. Spread a press cloth over your ironing board. Spray each flower petal and leaf with water, place on the press cloth and cover them with another press cloth. Iron the flowers and leaves flat using the highest steam setting the flowers will withstand. This is usually the cotton setting, but check first! You may choose not to use the top press cloth, but be very sure you have removed all plastic parts from the flowers. If your flowers resist flattening, place them under some heavy books overnight. Cut out your vest, serging or stay stitching all raw edges to stabilize them. Cut corresponding pieces of bridal tulle for all the vest pieces you will be applying the flowers to. It is helpful to cut the tulle a little larger than the vest pieces. Lay your vest pieces, right side up on a flat surface. Arrange the pressed flower parts on the vest. Feel free to trim the flower parts and leaves to better accommodate your design. When you are happy with the arrangement, spray the matching tulle vest piece with temporary spray adhesive and carefully place over the flower decorated vest fabric. Be careful with glue overspray...spread newspapers on the floor or use a large cardboard box to do your spraying in. You may need to place a few straight pins here and there to further secure the tulle and flowers to the vest fabric.
Using regular sewing thread in your bobbin to match the vest fabric and your choice of decorative embroidery thread in the top, freehand stitch the tulle to the vest fabric on your sewing machine using a normal stitch length. You can use a lazy meandering pattern, or crisscross the fabric in a grid. Just be sure that you stitch through all the flowers and leaves enough to prevent them from shifting.
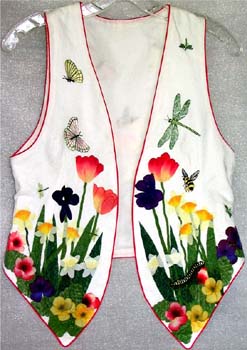
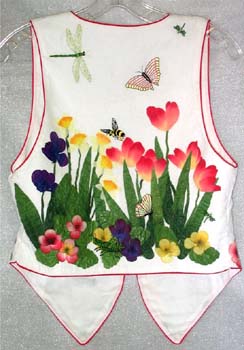
The silk flowers need to be covered by the tulle, but you may choose not to cover your whole vest with tulle. Only the floral portion of the bug vest shown is covered with tulle. If you wish to do this, decide where you want the tulle to stop, straight stitch along this line, trim the excess tulle away and zigzag stitch the new tulle edge. Use a very narrow zigzag in a normal stitch length. You do not need to zigzag the edges of the tulle when they will be enclosed in your seam allowances. Stay stitch again around the edges of the vest where the tulle has been applied. Trim the edges of the tulle flush with the edges of the vest fabric.
Embroider the vest with your choice of embroidery designs at this time. Using a size 90/14 embroidery needle is recommended. Bugs, butterflies and other pretty winged creatures are wonderful choices for embroidery on silk flowers.
Finish the vest according to your pattern instructions. Polysilk flowers are washable in cold or warm water, and can be machine dried on low heat. When ironing your finished vest, be sure to use a press cloth, or iron from the wrong side. The polysilk flowers will withstand the heat of your iron, but the bridal tulle will not.
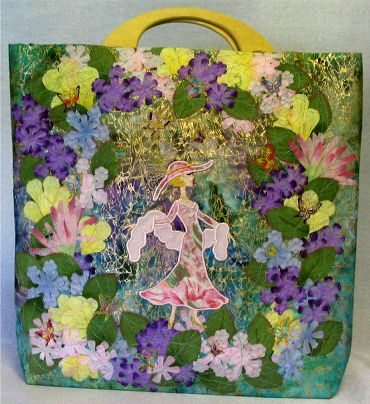
Variations and Other Projects: Another fun use for this technique is shown on the handbag. Here the flowers have been placed to form a frame for the fashion lady embroidery design. This bag features an Applique Red Hat Lady design from A Bit of Stitch. These directions may not be reproduced, copied or distributed without prior permission from Evy Hawkins at A Bit of Stitch. Thank you. |
Monday, September 7, 2009
Use Silk Flowers - with Embroidery

Subscribe to:
Post Comments (Atom)
No comments:
Post a Comment